One of the most common issues that homeowners experience with their LiftMaster garage door opener is flashing lights or error codes on the unit’s control panel.
These flashing lights and codes can indicate a variety of problems, from a simple sensor alignment issue to a more serious malfunction.
Understanding what these codes and flashing lights mean can help you diagnose and fix the problem quickly and easily.
Here are some of the most common error codes and flashing light patterns that you may encounter when troubleshooting your LiftMaster garage door opener.
Troubleshooting LiftMaster Flashing Lights Meanings
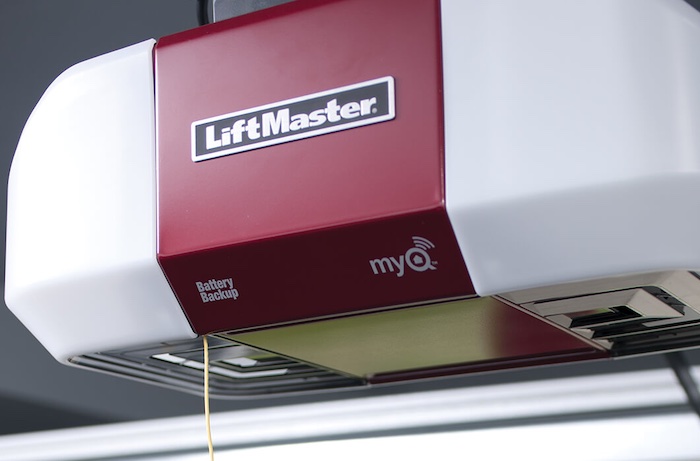
Liftmaster flashing green light
This indicates that the opener is in “safety beam” mode, which means that the safety sensors located at the bottom of the garage door tracks are not aligned properly. To fix this issue, simply realign the sensors by carefully adjusting their position until the green light stops flashing.
Liftmaster flashing red light
This indicates that there is an issue with the opener’s power supply. This could be caused by a blown fuse or a tripped circuit breaker. Check your home’s electrical panel to see if either of these issues is present and resolve it.
If there is no issue with the power supply in your home’s electrical system, you might want to contact the manufacturer or a professional to come to take a look at it, to ensure you’re not dealing with a serious problem.
Liftmaster flashing yellow light
This indicates that the opener is in “remote lock-out” mode, which means that the opener has been locked out of remote control operation. To unlock the opener, press and hold the “learn” button on the opener’s control panel for six seconds.
Liftmaster flashing red and yellow lights
This indicates that the opener is in “force control” mode, which means that the opener is sensing resistance on the garage door and will not close it. This could be caused by an obstruction on the tracks, a damaged opener, or a malfunctioning safety sensor.
Check the tracks and sensors for obstructions and ensure that they are properly aligned. If the problem persists, contact a professional for further assistance. You might also want to reach out to the manufacturer if the device is still under warranty.
Liftmaster flashing red and green lights
This indicates that the opener is in “service required” mode, which means that there is an issue with one of the opener’s internal components.
This could be caused by worn gear, a damaged circuit board, or a malfunctioning sensor. Contact a professional for further assistance or reach out to the manufacturer.
How to Reset the Liftmaster Garage Door Opener
If your LiftMaster garage door opener is experiencing issues that you cannot resolve, you may need to reset the opener to its factory default settings. This can often fix problems such as intermittent operation or remote control issues.
To reset your LiftMaster opener, you will need to locate the “learn” button on the opener’s control panel. The location of the button may vary depending on the specific model of opener that you have. Once you have located the button, press and hold it for six seconds. The opener’s lights will flash, indicating that the opener has been reset.
After resetting the opener, you will need to reprogram any remote controls or keypads that you use to operate the opener. Refer to the opener’s manual for instructions on how to do this.
How to Maintain Your Liftmaster Garage Door Opener
Regular maintenance of your LiftMaster garage door opener can help ensure that it continues to operate smoothly and safely for many years to come. Here are some tips on how to properly maintain your LiftMaster opener:
Check the Safety Sensors: The safety sensors located at the bottom of the garage door tracks are an important safety feature that prevents the opener from closing the door when something is in the way. Make sure that these sensors are clean, properly aligned, and functioning properly. If the sensors are dirty or misaligned, the opener will not close the door and the safety indicator light will flash.
Lubricate Moving Parts: The opener’s moving parts, such as the chain, gears, and pulleys, should be lubricated regularly to prevent wear and tear. Use a high-quality lubricant specifically designed for garage door openers to lubricate these parts.
Test the Remote Control: Test your remote control regularly to ensure that it is working properly. If the remote control is not working, try replacing the batteries or reprogramming the remote control.
Check the Door Balance: A garage door that is not balanced properly can put extra stress on the opener and cause it to wear out faster. To check the balance of the door, disconnect the opener and manually open and close the door. If the door is difficult to open or close, it is likely that the springs need to be adjusted.
Inspect the Tracks: The tracks that the opener’s trolley runs on should be inspected regularly for dirt, debris, and damage. Clean the tracks with a damp cloth and check for any dents or bent sections.
Check the Force Settings: The opener’s force settings should be adjusted to ensure that the opener is able to close the door securely without putting too much pressure on the door. Consult the opener’s manual for instructions on how to adjust the force settings.
Get Professional Service: Have a professional service technician inspect and service your opener at least once a year. They will be able to identify and fix any potential issues before they become major problems.
By following these maintenance tips, you can help ensure that your LiftMaster garage door opener continues to operate smoothly and safely for many years to come.
Wrapping Up
While LiftMaster garage door openers are known for their reliability and durability, they can sometimes experience problems. Understanding the flashing lights and error codes that the opener displays can help you quickly diagnose and fix the problem. If you are unable to resolve the issue on your own, contact a professional for further assistance.
![Genie Garage Door Opener Status Light Blinking [FIXED] Genie Garage Door Opener Status Light Blinking [FIXED]](https://techevery.net/wp-content/uploads/2023/01/genie-garage-door-opener-status-light-blinking-211x150.jpg)