Keurig coffee makers are a popular choice for many coffee lovers, but sometimes they can experience issues, such as dispensing too much water. This can result in weak coffee or even water overflowing from the machine.
In this guide, we will explore the causes of this problem and provide step-by-step instructions on how to fix it.
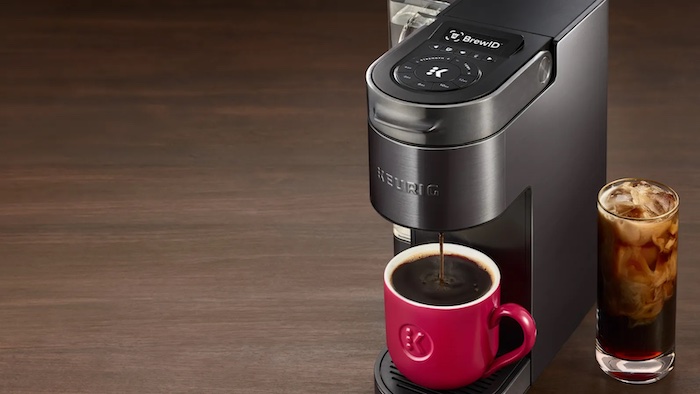
Keurig Dispensing Too Much Water: Common Causes
There are several possible causes for a Keurig dispensing too much water. Some of the most common include:
1. Clogged needle
One of the most common causes of a Keurig dispensing too much water is a clogged needle. The needle is the part of the machine that punctures the K-Cup and allows the water to flow through.
When the needle becomes clogged with coffee grounds or other debris, it can cause the water to flow through at a higher rate. To fix this problem, you will need to clear the needle using a paperclip or similar tool.
2. Incorrect water level
Another common cause of a Keurig dispensing too much water is an incorrect water level in the reservoir. If the water level is too high, it can cause the water to flow through faster than it should. To fix this problem, you will need to check the water level and adjust it as needed.
3. Incorrect settings
Incorrect settings on the Keurig can also cause the machine to dispense too much water. The settings on the Keurig control the amount of water that flows through the machine during the brewing process.
4. Damaged or worn parts
Over time, certain parts of the Keurig can become damaged or worn, such as the water pump or valves, which can cause the water to flow through at a higher rate, resulting in the machine dispensing too much water.
Keurig Dispensing Too Much Water: DIY Fixes
1. Check the Needle
To check the needle and ensure that is working properly, follow these steps:
- Turn off the Keurig and unplug it from the power outlet.
- You will find the needle at the top of the K-Cup holder.
- Use a paperclip or similar tool to carefully clear any debris from the needle.
- Once the needle is clear, plug the Keurig back in and turn it on.
- Run a test brew to see if the problem has been resolved.
2. Check the Water Level
To check the water level, here are the steps to follow:
- Locate the water reservoir on the side or back of the Keurig.
- Check the water level and make sure it is at the correct level. The water level should be between the MIN and MAX lines on the reservoir.
- If the water level is too high, remove some water using a measuring cup or pitcher.
- Run a test brew to see if the problem has been resolved.
3. Check the Settings
To fix this problem, you will need to check the settings and adjust them as needed. Follow the steps below to get it done:
- Press the settings button on the Keurig or consult the manual to find out how to access the settings on your specific model.
- Check the current settings for the water flow rate and make sure it is set correctly.
- Adjust the settings as needed.
- Run a test brew to see if the problem has been resolved.
4. Clean the Machine
Over time, the internal parts of a Keurig can become clogged with mineral buildup and other debris. This can cause the machine to dispense too much water. To fix this problem, you will need to run a cleaning cycle on the Keurig using a descaling solution or white vinegar.
Here are the steps to follow:
- Turn off the Keurig and unplug it from the power outlet.
- Empty the water reservoir and the K-Cup holder.
- Fill the water reservoir with a descaling solution or white vinegar.
- Run a cleaning cycle on the Keurig according to the manufacturer’s instructions.
- Once the cleaning cycle is complete, run several brews of plain water to flush out any remaining solution or vinegar.
- Run a test brew to see if the problem has been resolved.
5. Check for Damaged or Worn Parts
To fix this problem, you will need to check for any damaged or worn parts and replace them if necessary.
Here are the steps to follow:
- Turn off the Keurig and unplug it from the power outlet.
- Carefully disassemble the Keurig, following the manufacturer’s instructions or a guide online.
- Inspect the internal parts of the machine, such as the water pump, valves, and tubing, for any signs of damage or wear.
- Replace any damaged or worn parts with new ones, following the manufacturer’s instructions.
- Reassemble the Keurig and plug it back in.
- Run a test brew to see if the problem has been resolved.
6. Contact the Manufacturer
Finally, you might want to consider reaching to out the manufacturer if none of the fixes above gets the coffee maker to start dispensing the right amount of water.
Wrapping Up
A Keurig dispensing too much water could be due to simple problems that can be easily fixed. By following the fixes in this guide, you should be able to resolve the problem and enjoy your coffee once again. Remember to regularly maintain and clean your machine to prevent future issues.
It is important to note that if the machine is still under warranty, it is best to contact the manufacturer for assistance before trying to replace any parts yourself. If the machine is still under warranty and you take out the parts, you might void the warranty. Ensure you read and understand the warranty card before making use of any of the fixes we have provided above.
In case the problem persists even after trying all the above fixes, it is best to contact the manufacturer for further assistance or to look for a professional repair service.
